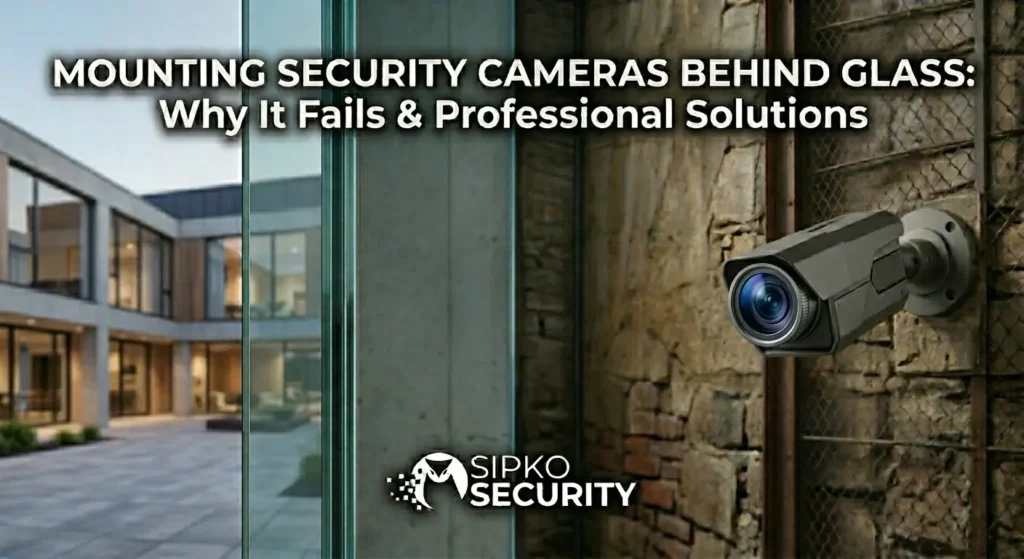
Mounting Security Cameras Behind Glass: Why It Fails & Professional Solutions
You want to hide your security camera behind glass. It makes sense, cleaner aesthetics, less visible to potential thieves, protected from weather. But here’s what happens in reality: your night vision disappears, condensation fogs the lens, and you end up with footage that’s worse than having no camera at all.
We get this question constantly from Melbourne homeowners and business owners. “Can I just mount it behind the window?” The answer is technically yes, but practically no. This guide explains exactly why glass mounting fails, when it might actually work, and what professional alternatives exist that actually deliver results. For broader context on camera placement, see our guide on CCTV camera placement for maximum protection.
We’ve installed hundreds of security systems across Melbourne, and we’ve seen every glass-mounting mistake in the book. We’ve also learned which scenarios can work and which are guaranteed failures. This isn’t theoretical, it’s based on real installations, real problems, and real solutions we’ve implemented for clients who initially wanted glass mounting but ended up with something better.
If you’re considering glass mounting because you’re worried about aesthetics or weather protection, there are better solutions. Read through this guide and you’ll understand why, and more importantly, what actually works.
1. Why Mounting Behind Glass Fails: The Real Problems
Let’s start with the reality: mounting a security camera behind glass creates three major problems that compound each other. It’s not just one issue, it’s a combination that makes the system nearly useless.
Problem #1: Infrared Reflection (Night Vision Failure)
This is the biggest issue. Modern security cameras use infrared (IR) LEDs for night vision. When you mount a camera behind glass, the IR light doesn’t pass through the glass, it bounces back. This creates a “washout” effect where the entire image becomes a bright, featureless white blob. You lose all detail, all ability to identify faces or objects, and essentially have a useless camera at night.
Why does this happen? Glass is reflective to infrared light. The camera’s IR LEDs emit light that hits the glass surface and reflects back into the camera’s sensor, overwhelming it. It’s like shining a flashlight at a mirror, you don’t see what’s behind the mirror, you just see the reflection.
Problem #2: Condensation & Fogging
Temperature differences between inside and outside create condensation on the glass surface. Moisture forms between the glass and the camera lens, creating a permanent fog that degrades image quality. In Melbourne’s climate, with temperature swings and humidity, this happens quickly, sometimes within hours of installation.
Once condensation forms, it’s extremely difficult to remove without disassembling the entire setup. You’re looking at a camera that’s essentially blind during the day and completely useless at night.
Problem #3: Glare & Reflection During Daylight
During the day, sunlight reflects off the glass surface, creating glare that washes out the image. Depending on the angle and time of day, you might have a bright spot in the center of your footage that obscures the very area you’re trying to monitor.
Glass mounting creates a camera that has poor night vision, condensation issues, and daytime glare. You’re paying for a security camera that doesn’t actually provide security.
2. The Physics: How IR Reflection Destroys Night Vision
Understanding the physics helps explain why glass mounting is fundamentally flawed. This isn’t a problem that can be “fixed” with better equipment, it’s a physics problem.
How Infrared Light Works in Security Cameras
Security cameras use infrared LEDs (typically 850nm or 940nm wavelength) to illuminate scenes in darkness. The camera’s sensor is sensitive to this infrared light, allowing it to “see” in the dark. This is why security cameras can record clear footage at night without visible light. For more on night vision technology, see our guide on why night vision sometimes looks worse than expected.
The camera emits IR light, that light bounces off objects in the scene, and the reflected light returns to the camera’s sensor. The sensor processes this reflected light and creates an image.
What Happens When Glass Gets in the Way
When you place glass between the camera and the scene, the IR light hits the glass surface first. Glass is reflective to infrared light, it doesn’t absorb it or let it pass through cleanly. Instead, the IR light bounces back toward the camera.
The camera’s sensor receives two signals: the reflected IR from the glass surface (very bright, very close) and the faint IR that managed to pass through the glass and reflect off distant objects (very dim, very far). The bright reflection from the glass overwhelms the sensor, creating a washout effect.
This is why glass-mounted cameras show a bright white image at night with no detail. The camera is essentially “blinded” by its own IR reflection.
Why Anti-Reflective Coatings Don’t Fully Solve This
You might think anti-reflective coatings would help. They do, but not enough. Anti-reflective coatings reduce reflection by 50-70%, but they don’t eliminate it. You still get enough IR reflection to significantly degrade image quality. Plus, anti-reflective coatings are expensive and add complexity to the installation.
The IR reflection problem isn’t a camera problem, it’s a glass problem. No camera can overcome the physics of infrared light reflecting off glass. Better cameras, better lenses, better IR LEDs, none of it matters. The glass is the limiting factor.
3. Condensation: The Silent Killer of Glass-Mounted Cameras
Even if you solve the IR reflection problem, condensation will destroy your image quality. This is a thermodynamics issue, and it’s nearly impossible to prevent in Melbourne’s climate.
Why Condensation Forms
Condensation forms when warm, humid air meets a cold surface. In Melbourne, this happens constantly. During the day, the glass heats up. At night, it cools down. The temperature difference causes moisture in the air to condense on the glass surface.
If the camera is mounted behind the glass (between the glass and the interior), condensation forms on the lens side of the glass. This creates a permanent fog that degrades image quality. You can’t wipe it away without disassembling the entire setup.
The Damage Cycle
Once condensation forms, it creates a cycle: moisture on the lens reduces image quality, which makes the camera less effective, which means you’re paying for a system that doesn’t work. In Melbourne’s humid climate, this can happen within 24-48 hours of installation.
Even if you manage to prevent condensation initially, seasonal changes will eventually cause it. Winter mornings in Melbourne are particularly problematic, the temperature drop creates ideal conditions for condensation.
Attempted Solutions (And Why They Don’t Work)
- Ventilation holes: Adding ventilation reduces condensation but creates security vulnerabilities and allows dust/insects to enter.
- Hydrophobic coatings: These help water bead up, but they don’t prevent condensation from forming. They just make it less visible.
- Heating elements: Some installers add heating to prevent condensation, but this is expensive, power-hungry, and unreliable.
- Silica gel packets: These absorb moisture but need constant replacement and don’t work in high-humidity environments.
You cannot reliably prevent condensation on a glass-mounted camera in Melbourne. The climate is too humid, and the temperature swings are too extreme. Any solution that works is expensive and unreliable.
4. When Glass Mounting Actually Works (Rare Cases)
Glass mounting isn’t always a complete failure. There are specific scenarios where it can work reasonably well. Understanding these helps you determine if your situation is one of them.
Scenario 1: Low-IR Cameras (Thermal or Specialized)
Some cameras use minimal IR or no IR at all. Thermal cameras, for example, detect heat rather than reflected light. These can work behind glass because they’re not relying on IR reflection. However, thermal cameras are expensive ($2,000-$10,000+) and overkill for most residential applications.
Alternatively, some professional cameras use very low IR output and rely more on ambient light. These work better behind glass, but they still suffer from condensation and glare issues.
Scenario 2: Specific Glass Types
Not all glass is created equal. Low-emissivity (Low-E) glass, used in modern windows for insulation, reflects less infrared light than standard glass. If your window is already Low-E glass, mounting behind it is more viable than standard glass.
However, even Low-E glass still causes significant IR reflection. It’s better than standard glass, but it’s not a complete solution.
Scenario 3: Daytime-Only Monitoring
If you only need daytime monitoring (e.g., monitoring a retail storefront during business hours), glass mounting can work. You’ll deal with glare and condensation, but at least you’ll have usable footage during the day. Night vision will be poor, but if you don’t need it, that’s acceptable.
Scenario 4: High-Quality Professional Installation
Professional installers can minimize (but not eliminate) glass mounting problems by:
- Using anti-reflective coatings on the glass
- Positioning the camera at specific angles to reduce glare
- Using specialized low-IR cameras
- Installing ventilation and condensation prevention systems
- Using high-quality glass with proper specifications
This approach is expensive and complex, but it can produce acceptable results. However, it’s still not as good as proper external mounting.
Even in the best-case scenarios, glass mounting is a compromise. You’re accepting reduced performance to achieve a specific aesthetic or practical goal. Make sure that goal is worth the trade-off.
5. Glass Types: Which Ones Are Suitable (And Which Aren’t)
If you’re determined to mount behind glass, at least use the right type of glass. Different glass types have different IR properties.
| Glass Type | IR Reflectivity | Condensation Risk | Suitable for Cameras? |
|---|---|---|---|
| Standard Clear Glass | High (70-80%) | High | Not Recommended |
| Low-E (Low-Emissivity) Glass | Medium (40-50%) | Medium | Acceptable |
| Anti-Reflective Coated Glass | Low (10-20%) | Medium | Better Option |
| Tempered Glass | High (70-80%) | High | Not Recommended |
| Laminated Glass | High (70-80%) | High | Not Recommended |
Best Glass Option: Low-E with Anti-Reflective Coating
If you must use glass, specify Low-E glass with an anti-reflective coating designed for infrared wavelengths. This combination minimizes IR reflection and provides the best possible performance. However, it’s expensive and requires professional specification.
Avoid These Glass Types
- Standard clear glass: High IR reflectivity, high condensation risk. Worst option.
- Tempered glass: Same IR properties as standard glass, plus it’s harder to work with.
- Laminated glass: Multiple layers increase IR reflection. Not suitable.
- Tinted glass: Reduces visible light transmission, making daytime footage darker.
If you’re working with a professional installer, ask them to specify the glass type and IR reflectivity percentage. Don’t just assume any glass will work, it won’t.
6. Professional Alternatives That Actually Work
Instead of struggling with glass mounting, consider these professional alternatives that deliver better results.
Option 1: Recessed Mounting
Mount the camera in a recessed housing built into the wall or ceiling. This provides weather protection and a clean aesthetic without the glass problems. The camera sits flush with the surface, and the housing protects it from the elements. This approach is similar to what we recommend in our professional CCTV installation guide.
Pros: Clean appearance, no glass issues, excellent weather protection, professional look.
Cons: Requires wall modification, more expensive than surface mounting, needs professional installation.
Option 2: External Mounting with Weatherproof Housing
Mount the camera externally with a professional weatherproof housing. Modern housings are designed to be discreet and blend with architecture. They provide full weather protection and eliminate all glass-related issues. See our guide on what’s included in a CCTV installation for more details on professional mounting options.
Pros: Best image quality, no condensation, no IR reflection, professional appearance.
Cons: Visible installation, requires weatherproof housing, slightly higher cost.
Option 3: Dome Cameras Designed for Glass
Some professional dome cameras are specifically designed to work behind glass. They use specialized optics and low-IR designs to minimize glass-related problems. These are more expensive but actually work. For camera comparisons, check our Hikvision vs Dahua comparison or Dahua vs Reolink guide.
Pros: Designed for glass mounting, better performance than standard cameras, professional appearance.
Cons: Expensive ($1,500-$3,000+), still not as good as external mounting, requires professional installation.
Option 4: Architectural Integration
Work with an architect or designer to integrate the camera into the building design. This might mean building a camera enclosure into the facade, using a camera-specific window design, or incorporating the camera into existing architectural elements.
Pros: Custom solution, professional appearance, can be very effective.
Cons: Expensive, requires professional design, long lead times.
For most Melbourne properties, recessed mounting or external mounting with weatherproof housing provides the best balance of performance, aesthetics, and cost. These solutions eliminate glass problems entirely while maintaining a professional appearance.
7. Installation Best Practices (If You Must Use Glass)
If you’ve decided to proceed with glass mounting despite the challenges, here’s how to minimize problems.
Step 1: Choose the Right Glass
- Specify Low-E glass with anti-reflective coating
- Request IR reflectivity testing (aim for <20%)
- Use single-pane glass if possible (multiple panes increase reflection)
- Avoid tinted or colored glass
Step 2: Position the Camera Correctly
- Mount at a 45-degree angle to reduce direct reflection
- Avoid direct sunlight on the glass surface
- Position away from heat sources that cause temperature fluctuations
- Ensure the camera is as close to the glass as possible (reduces reflection distance)
Step 3: Prevent Condensation
- Install ventilation holes (small, discrete) to allow air circulation
- Apply hydrophobic coating to the glass surface
- Use silica gel packets inside the housing (replace monthly)
- Ensure the camera housing is sealed except for ventilation
- Consider a small heating element for high-humidity environments (expensive but effective)
Step 4: Reduce Glare
- Install a sunshade or hood above the glass to block direct sunlight
- Use anti-glare film on the glass surface
- Position the camera to avoid reflections of bright objects
Step 5: Use the Right Camera
- Choose a camera with adjustable IR output (so you can reduce it to minimize reflection)
- Select a camera with good low-light performance (to compensate for glass transmission loss)
- Consider a professional-grade camera designed for challenging environments. See our Ubiquiti UniFi installation guide, AXIS camera installation, or Hikvision professional catalogue for options
Even with all these best practices, you’re still accepting compromised performance. This is not a “best practice” installation, it’s a “least bad” installation. Professional external mounting is always superior.
8. Common Mistakes & How to Avoid Them
We’ve seen these mistakes repeatedly. Learn from others’ failures.
Mistake #1: Using Standard Glass Without Specification
The Problem: Homeowners install a camera behind whatever glass is already there (usually standard clear glass) without considering IR properties.
The Result: Terrible night vision, condensation issues, poor daytime performance.
How to Avoid: Specify the glass type before installation. If you can’t change the glass, reconsider the mounting location.
Mistake #2: Ignoring Condensation Until It’s Too Late
The Problem: Installers don’t address condensation prevention, assuming it won’t be an issue. By the time condensation appears, the camera is already installed and difficult to access. This is similar to issues we see with cameras going offline due to environmental factors.
The Result: Permanent fogging, system replacement needed, expensive remediation.
How to Avoid: Plan for condensation prevention from day one. Install ventilation, use hydrophobic coatings, and monitor the system regularly.
Mistake #3: Mounting Too Far from the Glass
The Problem: Installers mount the camera several inches behind the glass, thinking it provides better protection. This actually increases IR reflection distance and makes the problem worse.
The Result: Worse night vision, more glare, more condensation.
How to Avoid: Mount the camera as close to the glass as possible. Ideally, the lens should be touching or nearly touching the glass surface.
Mistake #4: Using High-IR Cameras
The Problem: Installers use standard security cameras with high IR output, thinking more IR will compensate for glass reflection. It doesn’t, it makes it worse.
The Result: Severe washout at night, completely unusable footage.
How to Avoid: Use cameras with adjustable IR output, and reduce it significantly for glass mounting.
Mistake #5: Not Testing Before Final Installation
The Problem: Installers complete the installation without testing night vision, condensation, or glare performance.
The Result: Problems discovered after installation is complete, expensive fixes needed.
How to Avoid: Test the system thoroughly before finalizing the installation. Check night vision, daytime performance, and monitor for condensation over 24-48 hours.
If you’re hiring an installer for glass mounting, ask them about these common mistakes. A good installer will have solutions for all of them. If they dismiss these concerns, find a different installer.
9. When to Call a Professional
Glass mounting is complex enough that professional help is usually worth the investment. Here’s when you should definitely call a professional.
Scenario 1: Complex Architectural Requirements
If your property has specific architectural constraints (heritage building, specific aesthetic requirements, unusual window configurations), a professional can design a solution that works within those constraints.
Scenario 2: High-Security Requirements
If you need reliable, high-quality surveillance (not just “something”), professional installation is essential. Glass mounting compromises performance, and professionals can help you find better alternatives.
Scenario 3: Existing System Problems
If you already have a glass-mounted camera that’s not working well, a professional can diagnose the problem and recommend solutions (which might include relocating the camera).
Scenario 4: Integration with Existing Systems
If you’re integrating a new camera into an existing security system, professional installation ensures compatibility and proper configuration.
What to Expect from a Professional
- Site assessment: Evaluation of your specific situation and constraints
- Glass analysis: Testing of existing glass or specification of new glass
- Camera selection: Recommendation of appropriate cameras for your situation
- Installation planning: Detailed plan for condensation prevention, positioning, and testing
- Performance testing: Verification that the system meets your requirements
- Ongoing support: Maintenance and troubleshooting after installation
We provide professional security camera installation and consultation across Melbourne. If you’re considering glass mounting or need help with an existing system, we can assess your situation and recommend the best solution for your property. Call us for a free consultation.
10. Frequently Asked Questions
Q: Can I mount a camera behind glass and still get good night vision?
A: Not really. IR reflection off glass is a fundamental physics problem. You can minimize it with the right glass and camera, but you won’t get the same night vision performance as external mounting. If night vision is important, don’t use glass mounting. See our guide on external vs internal cameras for more context.
Q: What if I use a thermal camera behind glass?
A: Thermal cameras work better behind glass because they detect heat rather than reflected light. However, they’re expensive ($2,000-$10,000+) and overkill for most residential applications. They also have lower resolution than standard cameras. For most Melbourne properties, see our best CCTV systems for Melbourne homes for more practical options.
Q: How much does professional glass-mounting installation cost?
A: Professional glass mounting with proper glass specification, condensation prevention, and testing typically costs $1,500-$3,000 per camera. This is significantly more than standard external mounting ($500-$1,000).
Q: Can I fix condensation after it forms?
A: Not easily. Once condensation forms on the lens, you need to disassemble the entire setup to clean it. Prevention is much easier than remediation.
Q: Is anti-reflective coating worth the cost?
A: Yes, if you’re committed to glass mounting. Anti-reflective coating reduces IR reflection by 50-70%, which significantly improves night vision. It’s worth the extra cost.
Q: What’s the best alternative to glass mounting?
A: Recessed mounting or external mounting with weatherproof housing. Both eliminate glass problems entirely while maintaining a professional appearance. For more on choosing the right system, see our complete home security system guide.
Q: Can I mount a camera behind tinted glass?
A: Technically yes, but it’s not recommended. Tinted glass reduces visible light transmission, making daytime footage darker. It also has similar IR reflection issues as standard glass.
Q: How often do I need to clean a glass-mounted camera?
A: Frequently. Dust, condensation, and glare accumulate quickly. Plan on cleaning every 2-4 weeks, which is inconvenient and expensive if professional cleaning is required.
Ready for a Better Solution?
Glass mounting is a compromise that usually isn’t worth it. Professional alternatives deliver better performance, better aesthetics, and better long-term reliability. Let’s find the right solution for your Melbourne property.