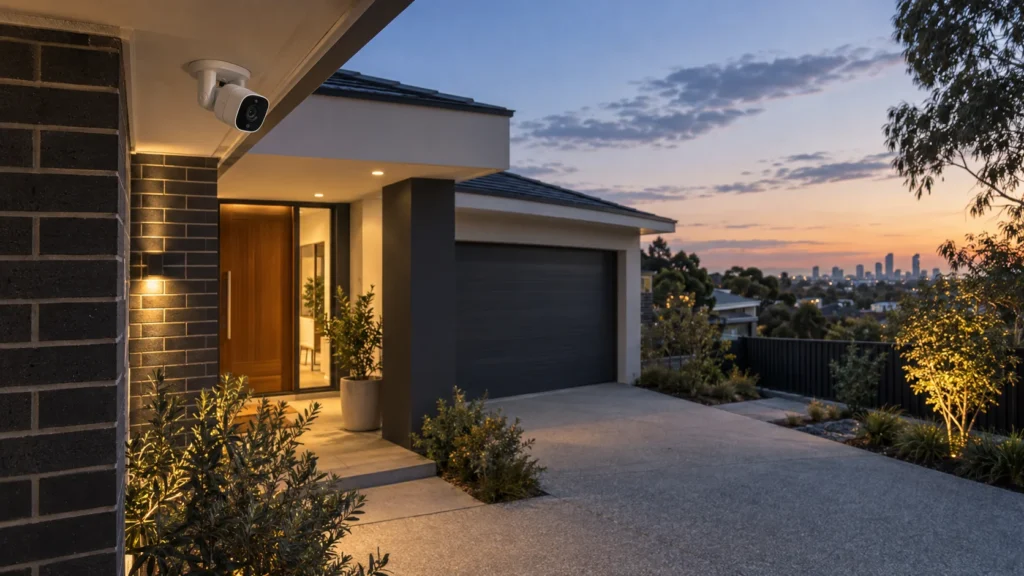
A front entrance, a driveway, a side gate — these are the obvious places to put a camera, and most placement advice stops there. But choosing the right general area is only the first decision. A camera mounted exactly where a checklist recommends can still miss the detail that matters: a wide view can leave a face or number plate too small to be useful, height and angle can change what’s actually visible, strong light behind a subject can turn a face into a silhouette, and a position that works well in daylight can behave differently after dark. This guide isn’t another list of where to point a camera. It’s a way of judging whether a position you’re already considering will actually produce footage you can use.
What Counts as Useful Footage Before You Place a Camera?
Before judging any position, it helps to be clear about what the camera actually needs to achieve there. “Seeing” an area and capturing something useful from it aren’t automatically the same thing. In practice, most residential cameras are really being asked to do one of three jobs:
- give general awareness that something happened in an area;
- let you understand what was actually going on in the scene;
- capture enough detail on a person or vehicle for that detail to be useful later.
None of these is more “correct” than the others — a wide overview can be exactly what’s needed for a backyard, while a front entrance may need more useful subject detail than a general backyard overview. The point is that these are different jobs, and a position that does one well won’t necessarily do another. A camera covering a driveway might comfortably confirm that a vehicle came and went, without ever being detailed enough to be useful beyond that. A camera covering a front porch might clearly show that someone stood at the door, without showing their face clearly enough to be useful later.
Once you know which of these three a given camera is actually for, it’s worth being specific about what that means for the image itself:
There is a measurable difference behind these coverage goals. Axis’s guidance based on IEC 62676-4 uses about 25 pixels per metre for detection and 250 pixels per metre for identification when footage is interpreted by a human viewer. That’s a tenfold difference in image density. It helps explain why a camera can clearly show that someone is present while still not capturing enough detail for identification.
Deciding which of these a camera is actually for — before worrying about the exact spot on the wall — is what the rest of this guide builds on.
Field of View vs Subject Detail
Every camera makes a trade-off between how much of a scene it shows and how much detail it shows of any one part of that scene. A wider field of view brings more of the property into frame, which is useful for context, but it also means anything within that frame — a person, a car, a face — occupies a smaller portion of the image. A narrower field of view does the opposite: less of the property is visible, but whatever is in frame is rendered in more detail.
This is a genuine trade-off, not a flaw to be engineered away. A driveway camera set wide enough to show the whole frontage of a property will often capture a vehicle clearly enough to confirm it was there, while leaving a number plate too small in the frame to be useful.
The camera isn’t malfunctioning and the position isn’t necessarily wrong — it’s simply set up to answer a different question than “what was the plate.”
For one concrete example, the AXIS F2115-R Varifocal Sensor changes from a 107.4° horizontal field of view at 3.2 mm to 56.3° at 5.7 mm. Those figures apply to that specific sensor, not CCTV cameras generally, but they illustrate how much the visible scene can change as focal length changes.
The practical implication is that field of view has to be chosen with the coverage goal from the previous section already in mind, rather than defaulting to “as wide as possible” on the assumption that more visible area is always better.
Height and Angle Can Create the Wrong View
Mounting a camera higher is often assumed to provide better coverage because it can bring more of the property into view. But height changes the angle at which everything below the camera is seen, and that has consequences for what the footage actually shows.
A camera mounted high and angled steeply down can produce a more top-down view, reducing the useful facial detail available in the image, and will foreshorten anything close to the base of the wall it’s mounted on. Depending on the mounting position and the angle chosen, an area close to or below the camera can also fall outside its useful view — not because of an obstruction, but because of the geometry of where the camera is fixed relative to where it’s pointed. This is sometimes described as a dead zone, and whether it matters depends entirely on whether it happens to fall across an area that actually needs coverage, like the approach to a door.
None of this means a particular height or tilt is right or wrong in the abstract. It means that the combination of height, angle and the position of whatever the camera is meant to capture has to be considered together — a camera can be aimed at exactly the right general area and still under-deliver on the one detail the footage was meant to provide.
Light Changes What the Same Camera Can Show
A position that looks fine when you check it during the day can behave very differently once the lighting in the scene changes — and the camera itself doesn’t need to move for that to happen.
The most common issue is backlighting: a camera facing toward a bright doorway, a light-coloured wall in full sun, or a window can end up exposing for that bright background, which leaves anything in front of it — including a person’s face — rendered as a dark, largely featureless shape. This happens because exposure has to accommodate very different brightness levels within the same scene, and a camera can only balance that so far. Positions worth checking carefully for this include:
- entrances or porches that face directly into morning or afternoon sun;
- any camera aimed toward a bright driveway, light-coloured wall or window from a shaded position;
- scenes that combine full sun on part of the frame with deep shadow on another part.
Better sensors and exposure processing can reduce the effect, but they don’t remove the underlying limitation that a camera has to balance bright and dark areas within one image, and a difficult lighting arrangement can undermine an otherwise sensible position. It’s worth actually reviewing footage from a candidate position at different times of day, rather than assuming a spot that looks clear at midday will behave the same way at sunrise or sunset.
Night Conditions Change the Placement Problem
A position that performs well during the day isn’t guaranteed to perform the same way after dark, and it’s worth checking rather than assuming.
At night, the result depends on factors such as available ambient light, the camera’s low-light performance and, where used, infrared illumination. Positions near glass, reflective surfaces or anything within the infrared beam’s path can also behave differently at night, sometimes producing glare or washed-out patches that weren’t a factor in daylight footage. A camera that gave a clear, well-exposed daytime image from a given position can end up with a noticeably less useful result from the same physical spot once night falls.
The point isn’t to turn this guide into a night-vision buying guide — it’s simply that a placement decision shouldn’t be judged from daytime footage alone. If a position matters enough to plan carefully, it’s worth checking what it actually looks like after dark before treating the placement as settled.
Several Cameras Still Need One Coverage Plan
Once a property has more than one camera, a new question appears that doesn’t exist with a single camera: do the individual views actually work together?
It’s easy to assume that adding cameras automatically closes gaps, but two individually useful views don’t automatically provide useful continuity between the areas they monitor. A camera covering the driveway and a separate camera covering the side path may each do their own job well, while the stretch between them is only loosely covered by either — not because either camera is faulty, but because they were planned as separate positions rather than as parts of one connected layout. The practical question isn’t just “does each camera see its assigned zone,” but “does the property stay meaningfully covered as a whole.”
This is a design consideration, not a checklist item, and it’s a different question from how many cameras a property needs in the first place. If you’re at the stage of estimating camera count for a property rather than reviewing whether existing or planned positions actually connect, our CCTV Camera Number Calculator is a more direct starting point — placement quality and camera quantity are related, but they’re not the same question.
Privacy and Camera Framing in Victoria
Where a camera is aimed involves more than image quality — it also affects what’s captured of the surrounding area, including neighbouring property.
Victorian surveillance law distinguishes what counts as a “private activity” using a specific statutory definition under the Surveillance Devices Act 1999 (Vic), and material published by the Victorian Law Reform Commission discusses that definition’s treatment of activity occurring outdoors, among other qualifications. Camera framing can therefore raise legal questions that depend on exactly what a system records and where — this is a matter for individual legal advice, not something a placement guide can settle.
Separately from any legal question, minimising unnecessary views into a neighbour’s windows or private living areas is simply sensible, low-friction placement practice, regardless of exactly where the legal line sits. Treating this as good practice rather than a strict legal requirement is the more accurate way to think about it.
Test the View Against the Original Goal
Bringing this together, a planned camera position is worth checking against a short set of questions before it’s treated as final:
- What does this camera actually need to show, and does the field of view support that level of detail?
- Does the height or angle change how the intended subject actually appears in frame?
- What happens to the image when there’s strong light behind the subject?
- Does the same position still produce a usable image after dark?
- How does this camera’s view relate to the cameras around it — does coverage stay continuous between them?
This is the most practically useful part of planning a camera position — not a new set of technical rules, but a way of pressure-testing a position you’re already considering before it’s fixed in place.
When a Professional CCTV Assessment Makes Sense
By this point it should be clear that placing a camera well involves more than choosing a wall or an entry point — it means weighing scene geometry, the level of detail actually required, changing light through the day and night, and how multiple cameras relate to each other, all at once, for a specific property.
If you’re planning CCTV for your property, a professional CCTV installation is the point where these factors can be considered together, rather than as separate camera decisions.
Frequently Asked Questions
Where should security cameras be placed around a home?
Entrances, driveways or other vehicle access areas, and side or rear access points are the usual starting zones, and which of these matter most depends on the property. But choosing the right zone is only the first step — field of view, angle, lighting and the level of detail actually required still determine whether the footage from that zone is useful.
How high should a security camera be mounted?
There’s no universal mounting height. The right height depends on the coverage goal, the resulting viewing angle, and how much subject detail is needed. Mounting higher isn’t automatically better — it can bring more of the property into view while making faces or other detail harder to capture clearly.
Should security cameras point directly at doors?
An entrance is often an important area to cover, but the right position depends on the approach direction, the level of detail needed, and whether lighting or backlighting will affect the view. There’s no single correct angle that applies to every front door.
Does a wider camera view give better CCTV coverage?
Not necessarily. A wider field of view shows more of the scene, which is useful for context, but it also means any person or vehicle in frame takes up a smaller part of the image — which can reduce the image detail available for recognition or identification.
Should CCTV camera placement be tested at night?
Yes. Ambient light, infrared illumination and reflections from nearby surfaces can all change how a position performs after dark, so a camera position that looks fine during the day is worth checking again once it’s dark before treating it as settled.
Sources
- Axis Communications — Pixel density based on IEC 62676-4:2014 — the detection/observation/recognition/identification pixel-density guidance referenced in this guide.
- Axis Communications — AXIS F2115-R Varifocal Sensor datasheet — focal length / horizontal field of view example.
- Axis Communications — Technical guide to network video — general reference on field of view, focal length and camera optics.
- Axis Communications — Wide dynamic range: WDR solutions for forensic value — backlighting and high-contrast scene exposure.
- Axis Communications — IR reflections in dome cameras — infrared reflection and night-time placement considerations.
- Victorian Law Reform Commission — Surveillance in Public Places, final report — discussion of relevant definitions under the Surveillance Devices Act 1999 (Vic).